Owning an airbrush opens up a lot of opportunities for you in the mini painting hobby. One of the advantages of an airbrush you will appreciate over and over is the ability to prime your models regardless of the weather outside.
Even though I wouldn’t buy an airbrush exclusively for priming minis, once I got my first one, I never looked back with regret when priming my models. For this article, I will be using my Iwata Eclipse to prime a mini that I printed on my Anycubic Mono 3d printer. The file can be purchased from loot studios. Priming is the same whether it is a model kit or a 3d printed mini.
Set your airbrush to the right settings
I like to use my airbrush at around 20psi. Some people prefer different settings, but I find that 20psi is about right for my style of painting. A large part of this depends on how far away you feel comfortable holding the airbrush from your models. If you want to hold it further away you will need more pressure, or less if you want to get in real close.
Choose your primer
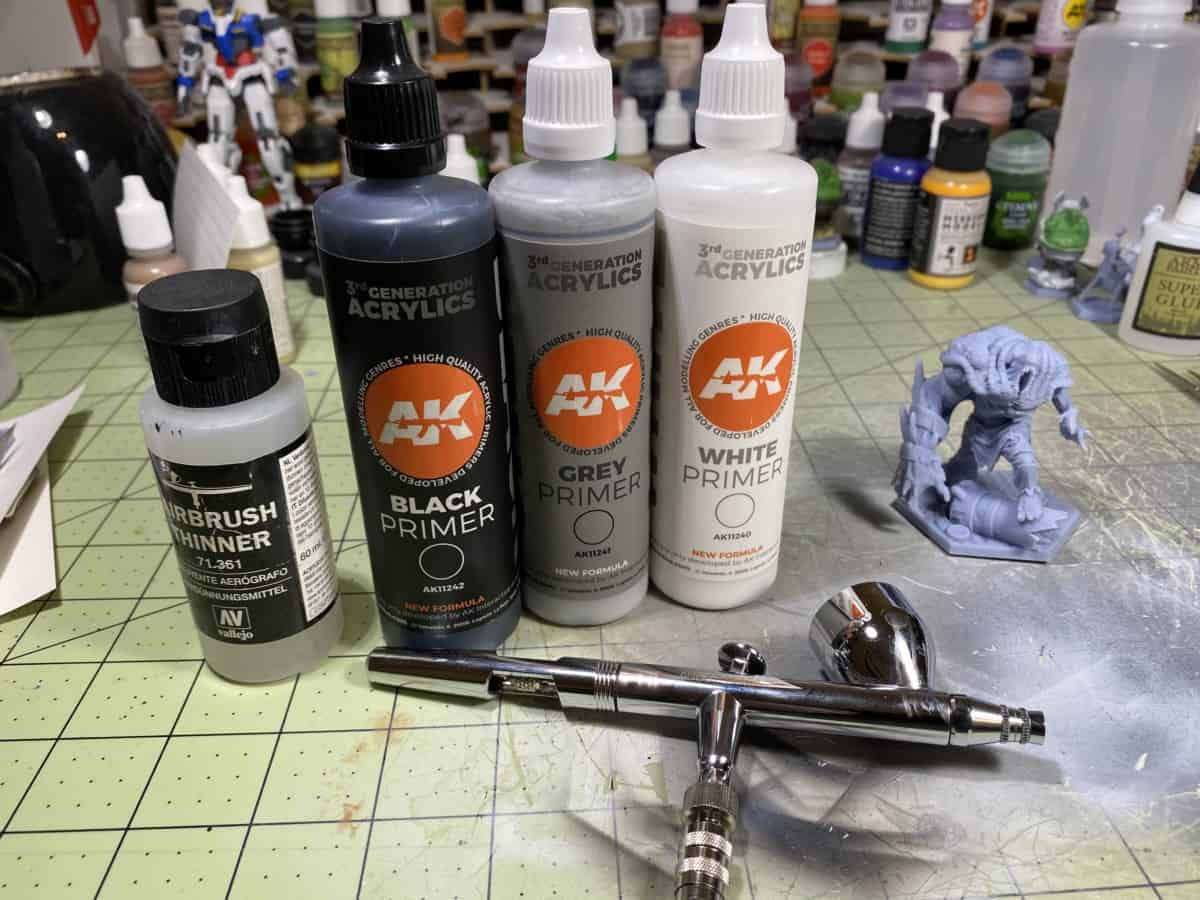
There are a lot of different brands of airbrush ready primers out there. I prefer to use water based acrylic primers such as AK interactive 3rd generation. Water based acrylic paint vapor is easier to deal with than enamel or varnish paints. I also only use a regular dust mask for these paints, I have a much more robust mask for the other types of paint. I have an article about primers that you can read here to help you choose.
Thin your primer

It has been my experience that even paint that claims it is airbrush ready needs to be thinned. I get better control and coverage when I have added a little bit of thinner and or flow improver to help it all get through my airbrush better.
You will get the most consistent results from thinning your paint in a small reusable plastic mixing cup and then pouring the mixture into your airbrush because you will be able to see the consistency of your paint a lot more clearly. But let’s face it, after a while, you will watch enough YouTubers mix paint directly in their airbrush that you will just want to charge ahead and mix the paint straight in your airbrush.
To get the best results mixing your airbrush primer follow these steps
- Select a mixing cup that is fairly small to avoid mixing too much paint to fit into a quarter of the paint cup on top of your airbrush.
- Add paint to the cup and then add a couple of drops of thinner or flow improver at a time to it, it takes much less thinner than paint to get the consistency that you want.
- Mix the paint thoroughly with an old paintbrush, and pay close attention to any particles that don’t want to break down with the rest of the paint, especially if your paint is getting old. These particles can clog your airbrush.
- Drag small amounts of paint up on the side of your mixing cup, if it flows back down and only leaves a small amount behind you are at the right consistency, if it doesn’t flow very well it is still too thick, and if you don’t see much pigment left on the side you have over thinned and need to add more paint.
- Pour the paint into your airbrush and check the spray pattern on your 3×5 card or a piece of paper to ensure that you have flow (If it is too thick it won’t flow through your airbrush well), and aren’t getting spiderwebbing (IF it is over thinned it will spread really fast on the paper and look like a spiderweb).
Try not to get discouraged by the learning curve, I ruined a couple of paint jobs when I got my first airbrush. Just remember that the paint companies have done their best to make these paints work well, but everyone sets up their airbrush differently, paint behaves differently in different climates, even if you think it is almost perfect for you straight out of the bottle you will get less tip dry with a few drops of flow improver.
Check the spray pattern before you spray your model

I keep a stack of 3×5 cards on my hobby table. These are great for all kinds of things like checking my spray pattern. You can see in the image above that I was getting a little bit of splatter, I hadn’t thinned quite enough so I added a couple more drops of flow improver. If I had forgotten this step, I would have gotten poor results from my primer.
Use controlled trigger movements
Avoid pulling your trigger back all the way, this will help to reduce flooding and help you get nice even coats of primer on your model. This is another advantage of thinning your paint and using an airbrush, you can get it onto your models and really have a lot of control doing it. If you have to spray full blast you might as well use a rattle can of primer because that is the level of control that you will have.
Keep your airbrush moving
Just because you are controlling your paint flow doesn’t mean that you should just let it build up in one spot. By moving your airbrush in random patterns you avoid missing spots as well as paint buildup.
Turn your mini over to make sure you get complete coverage

Remember that paint comes out in the shape of a cone. That means that it won’t cover the underside of the texture very well or even at all. I find that once it looks like I have primed the mini if I turn it over I generally see several places that were missed. You can see several spots that don’t have primer on them yet in this photo.
Check your mini to make sure you haven’t missed any spots
Give your minis a good once over after you are done to make sure that you haven’t missed any hard to see spots. The spots I most commonly miss are between the legs, armpits, weapons, and torsos, and the base directly under the model.
Clean your airbrush as soon as you are finished
Many primers have polyurethane in them that helps it adhere to the surface that is being painted. This is why primers stick to surfaces better than regular paint. This is also why it will stick to the inside of your airbrush if it is allowed to dry.
Your tools are only as good as you maintain them. It is very important to maintain your airbrush. It is a simple tool but a precisions tool at the same time. If you get paint drying inside of it you will have to spend quite a while cleaning it out before you will regain the performance that it once had.
I keep a squeeze bottle of water at my painting table so that I can quickly and easily rinse out the unused paint rather than blowing it through the front of the airbrush. The less paint that needlessly goes through your airbrush the less that has the opportunity to cause issues.
Next Steps
Once you have primed a few minis and feel comfortable doing it, head on over to my article about zenithal priming and see how that can take your priming to the next level.
These are my recommendations of things that I use all the time when painting miniatures
The Starter Paint Set That I Recommend for small budgets
The Starter Paint Set That I Recommend for large budgets
I like to listen to books on Audible while I paint
Check out these retailers to find hobby products
HOBBY STORES
USA / Canada: Noble Knight Games : eBay (US) :
UK: Element Games : Forbidden Planet
Global: Amazon : Redgrass Games : Warcolours
3D PRINTING
Anycubic : Elegoo : Creality : Sunlu : Flashforge : Matterhackers :

