One of the tools that I kept hearing about from other mini painters is an ultrasonic cleaner. I have heard that it works wonders for cleaning airbrushes and several people have also said that you can drastically cut the stripping time for your minis.
There are a few things that I learned when I bought my own ultrasonic cleaner to use for my hobby time. I am going to share these with you so that you can have realistic expectations and what to look for if you decide that this is a tool for you.
How does an ultrasonic cleaner work?
An ultrasonic cleaner has a metal tank that has a part called a transducer attached to it that puts a really loud high-pitched sound inside of the container.
The sound waves cause something called cavitation. It creates an increase in pressure against whatever is inside the cleaning fluid. This pressure creates bubbles that collide with the objects in the tank and causes dirt, or in our hobby, paint, to come loose from your minis. When it is combined with a solution that also helps the paint come loose chemically it doubles up the effectiveness.
The sounds that cause cavitation are too high frequency for humans to hear. When I run my ultrasonic cleaner it just sounds like just a little vibration. On a side note, it does mess up microphones so don’t try to record audio around them, especially with the lid open.
Things You Should Know About Ultrasonic Cleaners
- The Cleaning Solution You Use Makes a Difference
- Your Model Material Makes a Big Difference
- How The Type of Paint on Your Minis Makes a Difference
- Should You Use Heat When Stripping Your Minis
- Does Pre-Soaking Make a Difference When Stripping Your Minis With an Ultrasonic Cleaner
- How to Choose the Cycle for Your Machine
- The Placement of Your Cleaner Makes A difference
- Use the Plastic Basket
- Size Considerations
- Recommended Ultrasonic Cleaners
Recommended Ultrasonic Cleaners
Budget Pick check out this model on Amazon This cleaner has a 20 oz capacity so you could strip a space marine or two, but not really big enough for large projects or cleaning an airbrush. It is not very expensive so it would be a good way to start on a budget.
This is just like the one that I have This 2.5-liter model is the same as the one I have just a different color outside. It is simple to use and I get good results cleaning my airbrush and stripping models.
I would recommend against using any that are labeled as parts cleaners. These industrial cleaners are made for cleaning automotive and other parts. They might be too powerful for our minis and I don’t know how your soft plastic models would do in one of them.
The simple green that I use can be found here. Or LA’s Totally Awesome is also a great choice.
The Cleaning Solution Makes a difference
SAFETY FIRST: Even though I use a non-corrosive cleaning fluid it can be a skin irritant. Always use proper personal protection such as gloves, and place the cleaner in a well-ventilated area to minimize the possibility of irritation to you or others around you.
The instructions that came with my ultrasonic cleaner say to use room temperature water in the cleaner. The instructions say that you can also use other fluids as long as they aren’t corrosive. I use concentrated simple green in mine. It is my go-to for stripping models, but normally it takes quite a soak to get the paint to come off.
Using Water
When I first got my cleaner I ran it with plain tap water in the cleaner. Let’s just say that the mini was free of dust but not free of paint in any way. So let’s just rule out using it to strip models right from the get-go. None of the tests that I did went well when I used only water as the liquid in my unit.

Using Concentrated Simple Green
After I tried water, I switched to concentrated simple green. After I switched I got much better results than I did from water.
Simple green is what I have typically used for stripping models painted with acrylic paint. I usually soak them for a while and then scrub them with an old toothbrush. It takes a long time to get the results that I wanted.

The Material of Your Models Makes a Difference
Since we are dealing with vibrations it makes sense to me that different materials will react with those vibrations differently. This was definitely true. Harder materials don’t absorb as much of the vibrations as softer materials. This results in the vibrations acting on the paint much more strongly for pewter models than it does for plastic models.
Pewter Models
Pewter models stripped much easier with the ultrasonic cleaner than any of the softer materials that I tested. This Trollblood model that I used in my first test with a pewter model was stripped super easy compared to the plastic models. This picture was taken after a 5-minute cycle in the cleaner and about a 30 second scrub with an old toothbrush. You can see that most of the paint came right off, even in that short of a time period.

The vast majority of the paint was easily removed after one more cycle and a quick scrub. Once I spent a little bit of concentrated time with the model it came right off.

Hard Plastic Models
The next most rigid models that I tested were space marine models from Games workshop. These hard plastic models stripped fairly well, but not quite as well as the pewter models. One of the differences that I found interesting with the games workshop models is that they float.
I wasn’t sure if this would make a difference in the way that they would strip, or if I would have little spots that didn’t get it at all. I was pleasantly surprised that this wasn’t a particular issue with the floating models.
As I put the models into the cleaner they all got some liquid on all parts of the model as they went under the fluid. I think that some of the vibrations probably traveled through the cleaner to act on all parts. The models also moved around a lot as the cleaner created the cavitation. I am sure that this also contributed to them still getting fairly well stripped. I didn’t have any issues with them having spots that didn’t get treated like the rest of the mini.
Soft Plastic Models
Some models have plastic that you can easily flex and it bends right back to the shape it was in originally. This is very common with board game miniatures and some wargaming miniatures. The Warmachine Cryx models that I tested are softer than the space marines but not as soft as some minis that I have seen.
The Cryx models stripped the top layers of paint fairly well but the primer didn’t come off very well. This might have more to do with the type of primer that I used rather than the softness of the plastic though. More on that in the next section. But I really feel like soft plastic absorbs more of the energy from the cavitation and it works less well on this type of material.
How the Type of Paint on the Models Affects Stripping
Primers: I tested this with some really thick primer on the Cryx light warjacks. I also tested it with some Vallejo primer that I stayed on with my airbrush on the space marine models. I don’t know what kind of paint was used on the troll blood models because they were an eBay purchase.
The Light warjacks didn’t really strip past the primer very well. I think it stripped well enough to repaint the mini without any issues, but it definitely didn’t all come off.

Paint: I used the test models for my blood angel space marines. I applied several types of paint when I was choosing a paint scheme. Two have red acrylic ink, two have Turbo Dork metallic paints and one has red acrylic paint. Since I got the Trollbloods on eBay so I don’t know what kind of paint was on them.
Interestingly, the inks began to strip as soon as they hit the simple green. Check out the photo of them floating in the simple green before I even turned it on below.

Other types of paint had much more adhesion. Here is the before picture of the space marines.

You can see in the photo below that after one 5-minute cycle, the models in the back row were stripped fairly well. These were the ones that were painted using acrylic inks and traditional acrylic miniature hobby paint. But the models in front that had metallic paint didn’t change too much.

I think that it is important to note that the models had quite a bit of paint on them after the cleaning cycle. But this paint was really loosened. It came off with a quick scrub with an old toothbrush.
I put the models back in for a second cleaning cycle and a quick scrub with a toothbrush and this was the result.

You can see that the metallic paint was beginning to come off, but the color-shifting paint from TurboDork was still looking pretty new. That is some good adhesion.
Should you turn on the heat
Some ultrasonic cleaners have the option of a heating element in the cleaning reservoir. My thought on this feature is, don’t use it with plastic models. Plastic models are easily bent and adding heat makes them bend even more easily. Your cleaning solution will warm up over several cleaning cycles anyway. We don’t need to compound it with heating elements.
The other thing that you need to keep in mind when introducing heat is that your cleaning fluid may not be intended to warm up. When you heat fluids some of it will evaporate. There is the potential that this airborne cleaner could be an eye or lung irritant. Take extreme caution if you decide to use the heating element in your cleaner and you are running anything other than water. Consult the MSDS sheet from the manufacturer of the product(s) that you are using.
Does it make a difference if you pre-soak your minis
Most of the models that I tested with my ultrasonic cleaner didn’t require any pre-soaking. The paint started to come off hours sooner than it would have with my traditional method. The cavitation of the machine combined with the power of the simple green worked really well. Except for one model.
For the model that was painted with the TurboDork Ground is Lava paint, I think that it would have been beneficial to do a good pre-soak. But there wasn’t any way for me to know this beforehand.

In my article about other stripping methods, I will tell you how I finally got the paint to come off that particular model.
Choosing the Cycle for Stripping Your Minis
My cleaner can be set in one-minute increments with a maximum cycle of 5 minutes. Different machines have different cycle options. Some can run for longer cycles, but others can only run for shorter cycles.
To choose the optimal cycle time. Set the machine at the longest cycle that it will run probably not more than 10 minutes though, and let it rip. See how your models and paint combination react and adjust from there.
Over several cleaning cycles, your cleaner will start to heat up. Be careful not to overdo it. I only run mine a few times before I let it sit and normalize the temperature. the larger your tank the slower it will heat up because of the larger volume of fluid.
you will probably want to try it with a model that you care less about than others, just in case, but I would follow the same method that I used.
Location matters
When I first got my ultrasonic cleaner I hadn’t cleaned off a spot for it on my hobby table yet. I was excited to see how it worked so I placed it in the corner on the carpeted floor and started the first cycle.
I think that the carpet padding absorbed some of the vibrations because this type of cleaner uses vibration to clean things, it made it work less effectively.
When I cleared a spot for it and placed it on a nice solid surface the effectiveness went way up. This may be obvious to you, but it just didn’t occur to me until I saw the difference with my own eyes.
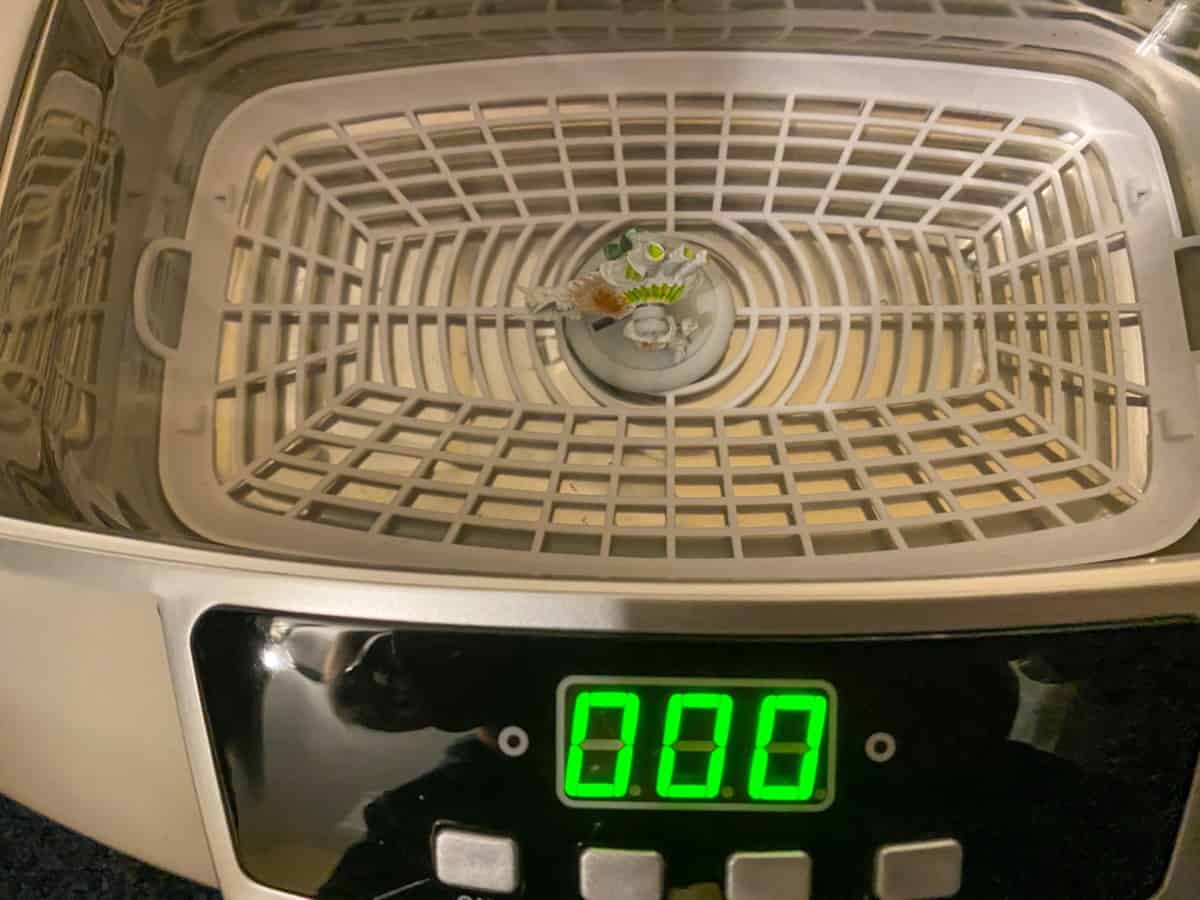
Use the Plastic Basket
One of the other things that didn’t really occur to me when I first got my cleaner, was that I needed to use the plastic tray that came inside the reservoir.
Many models come with a plastic basket, but some like mine just have a plastic tray that sits at the bottom of the reservoir. This is a very important piece of the machine. As I briefly went into how the materials that your minis are made out of, different density materials respond differently to the cavitation of these machines.
In order to get the most out of cavitation, there needs to be a difference between the frequency that the fluid is vibrating and the material to be cleaned is vibrating. The soft plastic basket or tray helps to dampen the vibration rate of the materials to be cleaned.
If you remove the basket and place your mini directly on the metal surface, the inducer will send vibrations directly into the mini as well as the fluid. This will reduce the difference in the vibration rates and the cavitation will be much less effective.
Consider the Size of Your Cleaner
Cleaners get more expensive the larger they are. So how large of a cleaner do you actually need?
What are you going to use it for? I got mine primarily for cleaning my airbrush with a side benefit that I could use it to strip the paint from eBay purchases. I made sure that it was large enough that I could get my airbrush’s needle into it without worrying about it vibrating against the side of the machine.
I don’t anticipate stripping any tanks or planes in this so I didn’t try to get one large enough for anything like that. For me, that would just be overkill.
Also, keep in mind that the larger the tank the more fluid it holds. Mine is pretty big it holds 2.5 liters. I will strip a lot of minis at once though, and I never worry about getting all of my airbrush parts in there and having them too cramped together. So it is really just a trade-off.
These are my recommendations of things that I use all the time when painting miniatures
The Starter Paint Set That I Recommend for small budgets
The Starter Paint Set That I Recommend for large budgets
I like to listen to books on Audible while I paint
Check out these retailers to find hobby products
HOBBY STORES
USA / Canada: Noble Knight Games : eBay (US) :
UK: Element Games : Forbidden Planet
Global: Amazon : Redgrass Games : Warcolours
3D PRINTING
Anycubic : Elegoo : Creality : Sunlu : Flashforge : Matterhackers :

