Materials needed for this project
- Base
- Corkboard
- Paint you can do all of this easily with a brush. However, an airbrush can be used to make some OSL effects a little easier if that is something that you decide to do. These links are to suggested retailers for paint, The links are for Vallejo, but you can use any brand that you like. My favorite places to buy paint include my friendly local game store, in North America Noble Knight Games, Amazon, in the UK Element Games
- Black
- Gray
- Orange-Brown
- Red
- Bright Orange
- Yellow
- White
- Glue
- Bits for around the base

Use cork to make rocks
Lava rocks are generally black and rough. They are burnt and cindered rocks that have been thrown from a volcano. Break up your corkboard into slabs and rough chunks to make small rocks. You can layer these to create space on your base.
Make large platform rocks

Cut some chunks of the corkboard large enough for the mini to stand on. Make the sides rough so that it resembles rough stone. Use a sculpting tool or your pin vise to rough up the top of the stone platform to make it look more realistic.
Make small bits of rocks

Break up some more of your corkboard into small pieces to use to make rocks. These will come in handy to decorate the base so that it looks more naturally occurring.
Use small round bits to make bubbles
If you add small round bits under the PVA glue you can make it look like bubbles are forming and ready to pop. You can use anything that you want to make the bubbles, as long as they look good on the scale of the base that you are making. I use peppercorns from my kitchen for 30mm figure bases like you find in Warhammer.
Assembling your base parts
After you have created to pieces that I have outlined above, try several different placements until you find one that you like. Use the super glue to attach the cork to the base.
Larger bases will give you more options for the layout of the rocks and the flow of the lava.
In a well of your palette, mix a little bit of water into your PVA glue so that it will flow a little bit, but it is still fairly thick. I use an old paintbrush to transfer it from my palette to the areas of the base that will have the lava.
Make sure the PVA glue gets into the recesses of the base, and up onto the cork a little bit, in order to create the look of the lava flow. It might take more than one application to get the results that you want, especially when you are covering the bubbles.
Be patient, this is the most time-consuming part, but it really makes a difference if you get it right. If you are a painter that likes to use a hairdryer to accelerate the drying time of your minis, resist the urge to dry the PVA glue here. You will cause small waves to form that won’t resemble lava at all.
Painting
Prime in Black

A good even coat of black primer will get the cork looking like rocks. You can prime any color that you want, but priming in black will let you skip the step of painting your rocks black.
Black will begin the depth of the rocks and prep them for the rest of the paint job.
Drybrush Gray

Drybrush gray paint to create highlights on the rocks. Concentrate your efforts in this step to bring out the texture that you created on the sides of the rocks.
Orange-Brown

The lava won’t be as vibrant if you go straight red over black. It helps to lay down an intermediate color to give a nice base to your lava. I use a nice burnt orange or burnt umber as this intermediate step.
Fully paint the recesses where the lave flow will be prep the warm colors, make sure that you get all the way over to the rocks on the side. this will be where the lava is coolest before becoming solid.
Red

Red is the next step in the heat transition of your lava. You will layer the lava leaving a little bit of burnt orange at the edges. try to feather the transition between the two colors so that it isn’t an abrupt transition.
Bright red-orange
It’s time to start bringing the heat with this color. This is where the lava will really start to look hot. You can even use this color to create an OSL glow effect on the sides of your rocks if you want. Bright orange is the majority of the center area of your lava to make it really glow with heat.
Yellow

Yellow for the hottest spots in the center of the lava. This is the brightest color that you should use, except for the case that I will list next. Use Yellow sparingly to bring out the hottest spots. Overuse will really detract from its effectiveness. This is a situation where less truly is more.
White

In my opinion, there is only one time to use white on your lava base. When you have chosen to make bubbles in the lava on your base, highlighting with a spot of white can really make it look like those bubbles are ready to pop.
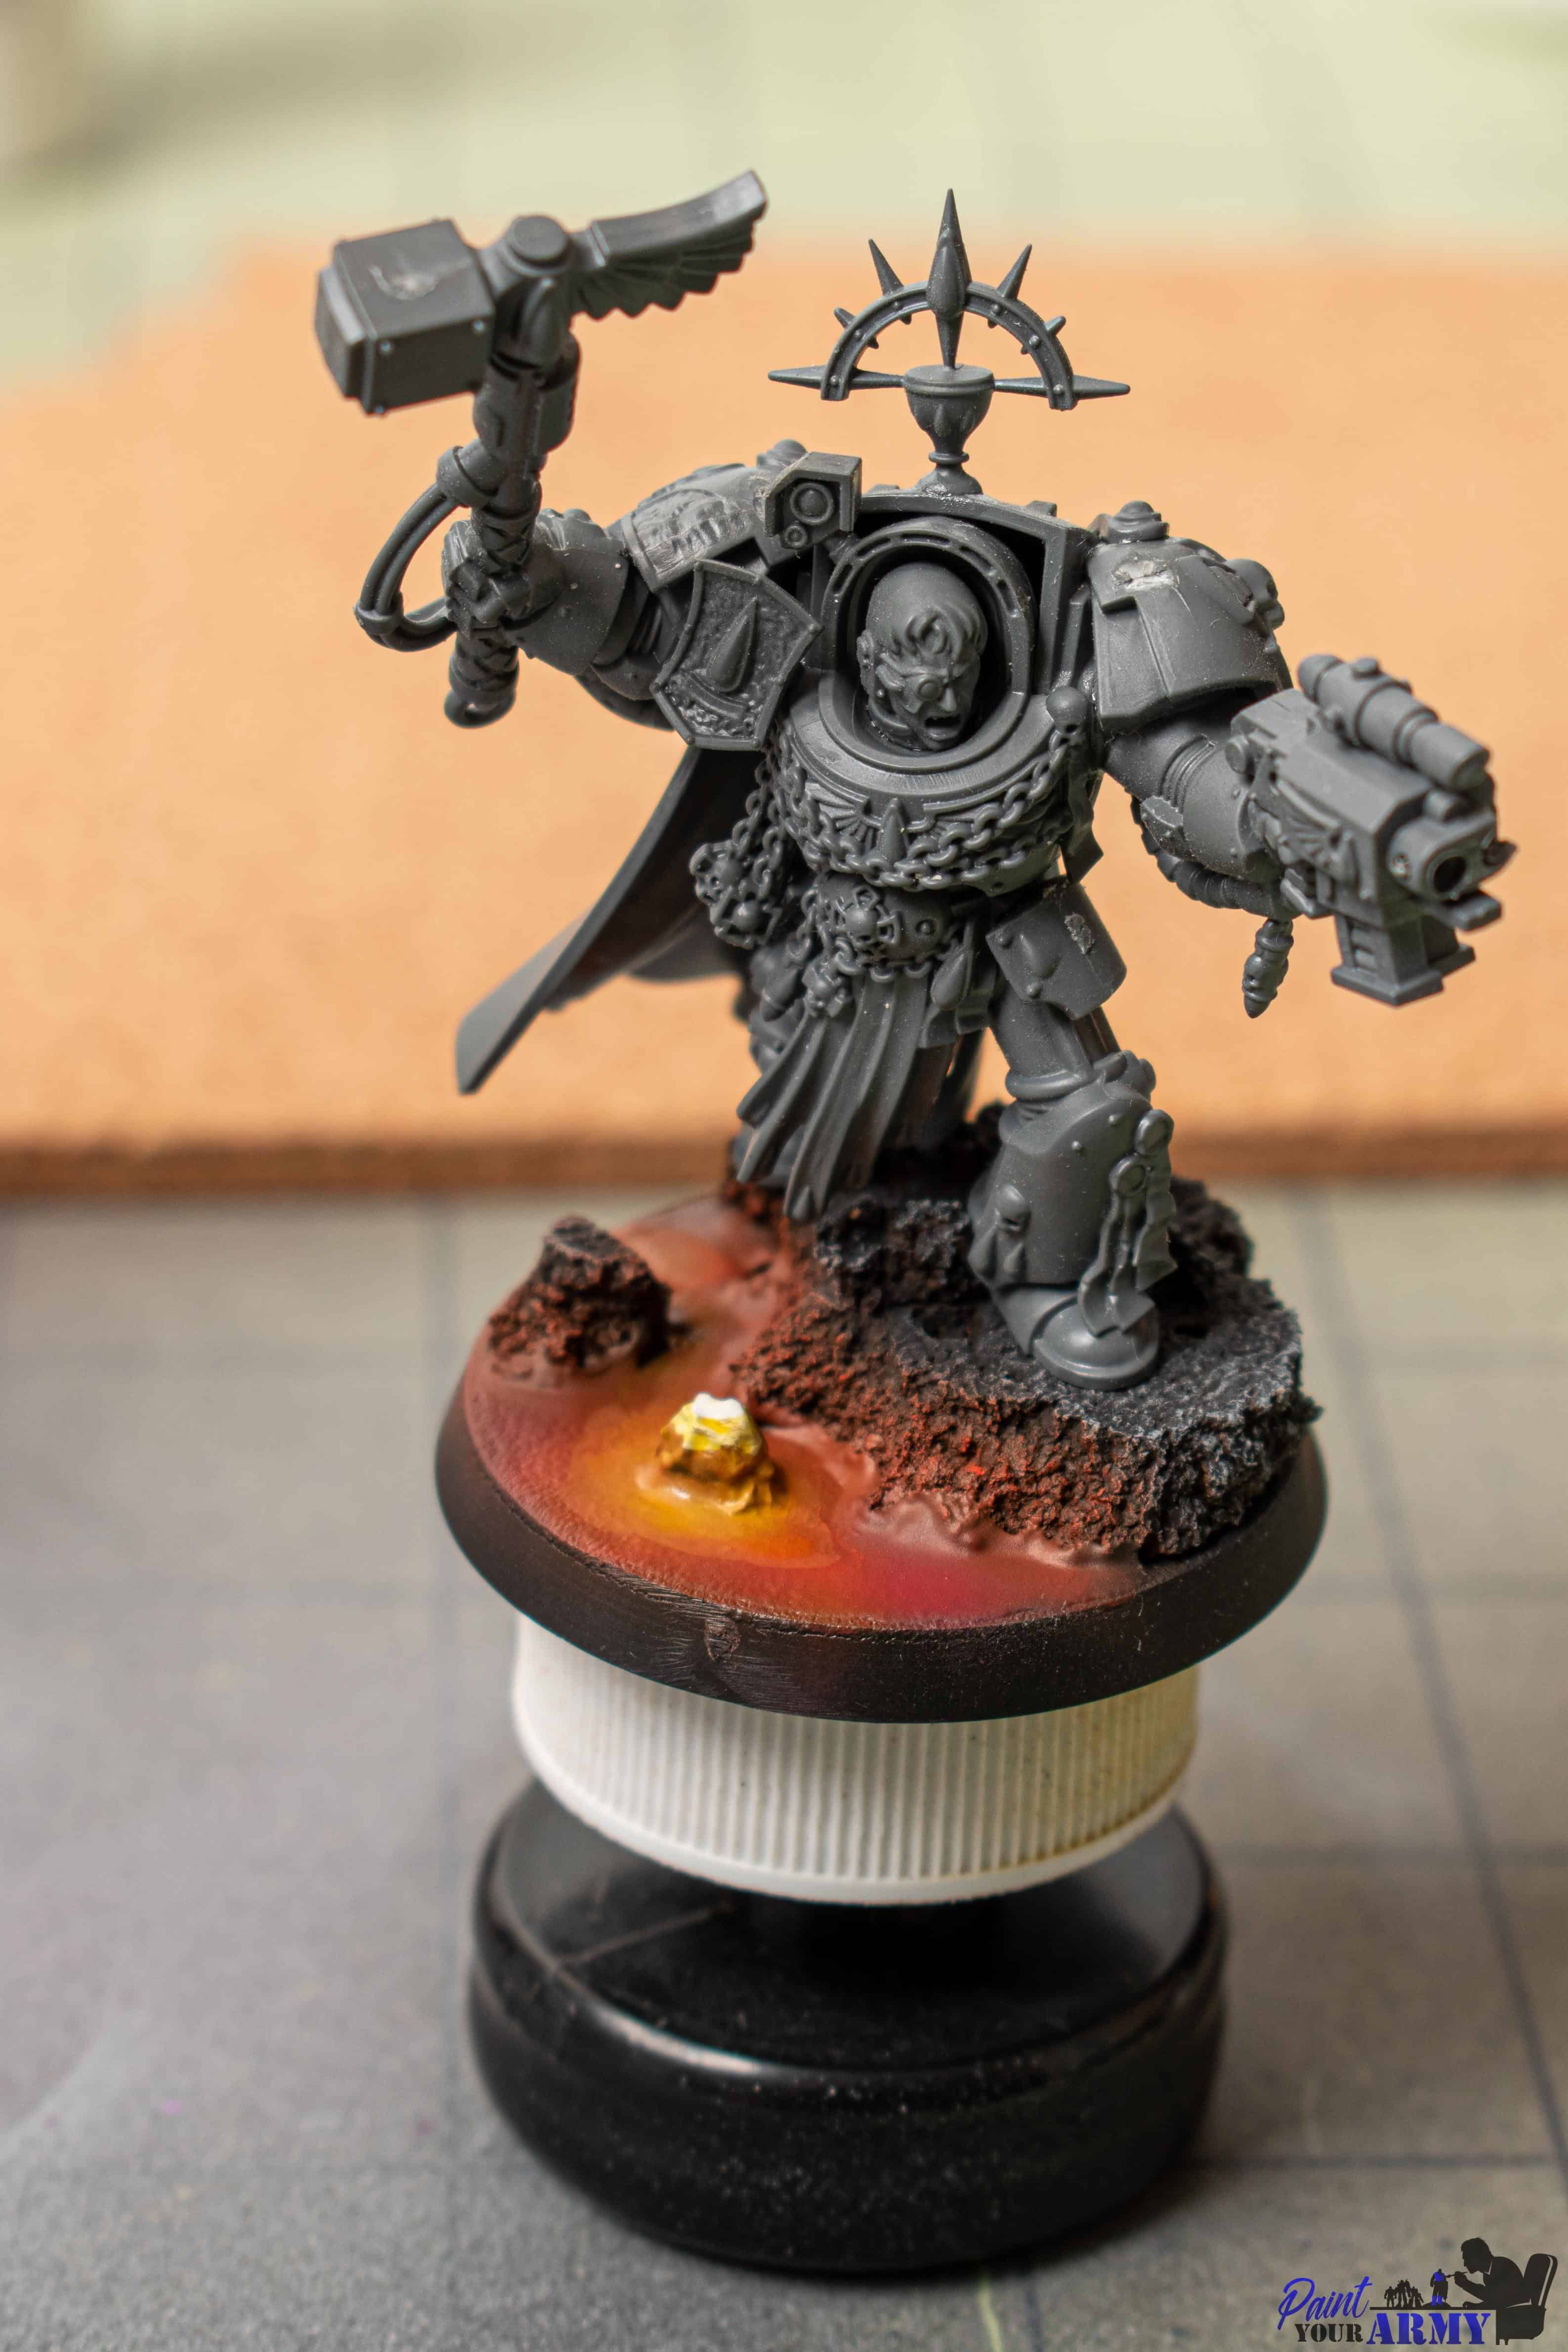
I painted the top half of the bubble white and then glazed over it with yellow to make it extra bright. Then I painted just the very top of the bubble with pure white paint.
Pin Your Model to The Base

Because cork is a super soft material it breaks apart easily. If you glue your mini directly to the painted cork surface it can easily break away from it. By pinning the mini to the base you can ensure that it has a lot more hold and stability.
Use your pin vise to drill through the layers of cork and the base as well. Run the pin from the heel of the mini through the cork and then anchor it with a twist on the underside of the base.
For a full tutorial on pinning models to bases check out this guide.
These are my recommendations of things that I use all the time when painting miniatures
The Starter Paint Set That I Recommend for small budgets
The Starter Paint Set That I Recommend for large budgets
I like to listen to books on Audible while I paint
Check out these retailers to find hobby products
HOBBY STORES
USA / Canada: Noble Knight Games : eBay (US) :
UK: Element Games : Forbidden Planet
Global: Amazon : Redgrass Games : Warcolours
3D PRINTING
Anycubic : Elegoo : Creality : Sunlu : Flashforge : Matterhackers :


