Hey there, fellow miniature enthusiasts! It’s me again, your friendly neighborhood miniature painter. Today, we’re going to talk about something that can be a little intimidating for some: troubleshooting common airbrush problems and issues. If you’ve been following my series of articles on using an airbrush for our beloved hobby, you know that mastering this tool can make a world of difference in your creations. So, let’s dive in and get you back to airbrushing like a pro in no time!
Many times there is more than one possible solution for a problem. I will guide you to the one that will be best for your situation.
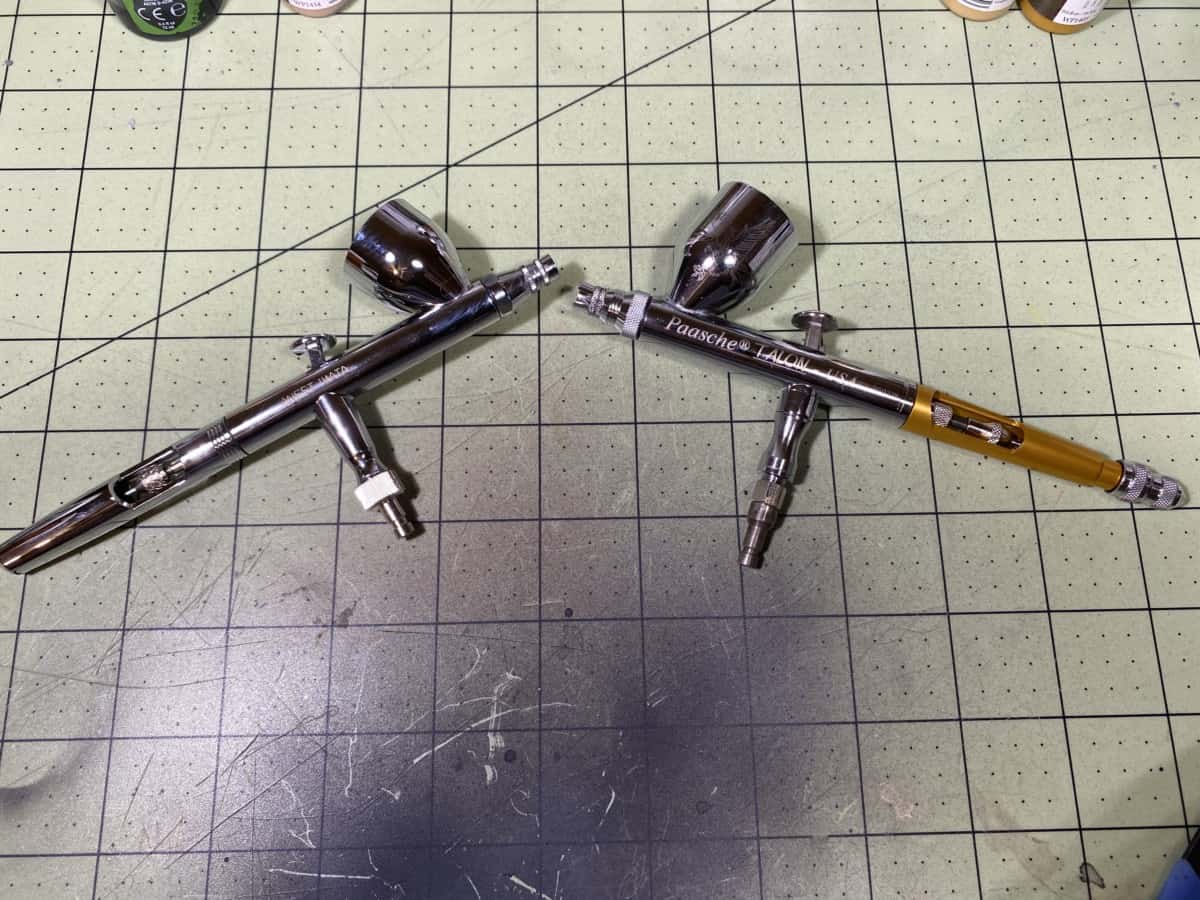
Before I start using my airbrush I go through a quick checklist to make sure it is working properly. Not much is more frustrating than getting paint mixed in your airbrush just to realize that the needle is stuck and you have to disassemble it to fix the issue.
Airbrush Pre Painting Session Checklist
The vast majority of airbrush problems are much easier to address without paint in the cup. This is a quick checklist that I run through before every paint session.
- Check to ensure that you have the needle and other components that you expect to be there, needle size matches the nozzle and needle cap, if you have a removable paint cup it is properly attached, etc.
- Check all of your fittings between your air compressor and airbrush
- Check to make sure that the trigger pulls back smoothly and seats fully forward
- Check the moisture trap on the air compressor
- Turn on the air compressor
- Check to make sure that air is flowing when the trigger is pressed down
- Put a couple of drops of water into the paint cup and see if it sprays out in a fine colorless and odorless mist
If everything is as expected, go ahead and start your paint session, if not troubleshoot the issue before you add paint to the mix.
Clean your airbrush
Many of the problems that I will go over below can either be caused by or made worse by a dirty airbrush. If the paint dries inside of your airbrush, even just little bits of paint, it can obstruct the flow of paint causing pressure irregularities, etc. Proper airbrush care will go a long way in helping you to avoid these issues and contribute to the long life of your expensive painting tools.
The better care you give to your tools, the better they will perform and the longer they will last.
This is such an important process that I have written an article all about proper airbrush cleaning and care that you can find here.
Clogged Nozzle or Needle
A clogged nozzle or needle can put a frustrating halt to your miniature painting progress. But don’t worry! With a little patience and the right approach, you’ll be back to painting in no time. Here’s a more in-depth look at how to diagnose and resolve clogs in your airbrush nozzle or needle.
Diagnosing a Clogged Nozzle or Needle:
You might be dealing with a clogged nozzle or needle if:
- Your airbrush sputters or struggles to spray paint consistently.
- The paint flow suddenly stops, even though there’s still paint in the cup.
- The spray pattern appears inconsistent or patchy.
Step-by-Step Guide to Clearing a Clogged Nozzle or Needle:
- First, turn off and disconnect your airbrush from the air supply. Safety first!
- Remove the needle by loosening the needle chucking nut and carefully sliding the needle out of the airbrush. Be mindful of the needle’s sharp tip.
- Wipe the needle gently with a soft cloth dampened with airbrush cleaner to remove any paint residue. Inspect the needle for damage, as a bent or damaged needle can also cause issues.
- Next, unscrew the nozzle cap and nozzle from the airbrush. Keep track of any small parts to avoid losing them.
- Soak the nozzle and nozzle cap in airbrush cleaner for about 10-15 minutes. This will help dissolve and loosen any dried or stubborn paint.
- Use a small, soft brush (like a dental or interdental brush) to gently scrub the inside of the nozzle and nozzle cap. Be cautious not to apply too much pressure, as this could damage the delicate parts.
- Rinse the nozzle and nozzle cap with clean water and allow them to air dry completely.
- Reassemble the nozzle, cap, and needle, making sure everything is properly aligned and seated. Tighten the needle chucking nut to secure the needle in place.
- Reconnect your airbrush to the air supply, and test the paint flow on a scrap piece of paper or cardboard. If the issue persists, repeat the cleaning process or consider seeking help from a professional or the manufacturer.
Preventing Future Clogs:
To minimize the risk of future clogs:
- Clean your airbrush thoroughly after each use. This includes flushing it with airbrush cleaner and wiping down the needle.
- Use paint specifically formulated for airbrushing, as it’s less likely to clog your nozzle or needle.
- Ensure your paint is properly thinned and mixed before using it in your airbrush. This will help prevent paint buildup and reduce the risk of clogs.
- Store your airbrush in a cool, dry place when not in use to minimize the chance of paint drying inside the nozzle or needle.
By following these tips and maintaining your airbrush properly, you can avoid most clogs and keep your painting sessions running smoothly.
Spattering
Spattering can be a frustrating issue to encounter when airbrushing your miniatures, as it can result in an uneven or messy finish. Fortunately, there are several ways to diagnose and address the root cause of spattering. Let’s explore some common causes of spattering and how to fix them.
Diagnosing Spattering Issues:
You may be dealing with spattering if you observe:
- Uneven, speckled patterns on your painted surface.
- Small droplets of paint forming outside the intended spray area.
- An inconsistent flow of paint from the airbrush, leading to an irregular finish.
Common Causes of Spattering and How to Fix Them:
- Incorrect Air Pressure:
- If your air pressure is too high, it can cause the paint to atomize too much, resulting in spattering. Conversely, if it’s too low, the paint may not atomize properly and form larger droplets.
- To fix this issue, adjust your air compressor’s pressure setting. For most miniature painting applications, a pressure between 15 and 30 PSI should suffice. However, this may vary depending on the specific paint and airbrush you’re using, so refer to the manufacturer’s recommendations.
- Improperly Thinned Paint:
- Using paint that’s too thick or too thin can lead to spattering. Thick paint may not flow smoothly through the airbrush, while overly thin paint may not adhere properly to the surface.
- Ensure that your paint is thinned to the right consistency for airbrushing. This may require some trial and error, as different paint brands and colors may have varying requirements. A general guideline is to aim for a consistency similar to milk.
- Clogged or Dirty Airbrush Components:
- Buildup of paint residue in the airbrush nozzle or needle can cause spattering by disrupting the flow of paint.
- To resolve this issue, clean your airbrush thoroughly, paying particular attention to the needle and nozzle. Refer to the expanded “Clogged Nozzle or Needle” section for detailed instructions on cleaning these components.
- Damaged Needle or Nozzle:
- A bent or damaged needle, or a cracked nozzle, can cause spattering by altering the spray pattern.
- Inspect your needle and nozzle for damage. If you find any issues, consider replacing the damaged part.
- Trigger Control:
- Applying too much or too little pressure on the trigger can lead to spattering.
- Practice your trigger control to find the right balance for a smooth, even spray. This may require some trial and error, but with time and experience, you’ll develop a better feel for how much pressure to apply.
By addressing these common causes of spattering, you can achieve a smoother, more consistent finish on your miniatures. Remember that practice makes perfect, and don’t be afraid to experiment with different techniques and settings to find what works best for you.
Airbrush Not Spraying Paint
When your airbrush isn’t spraying paint, it can be both frustrating and puzzling. Don’t worry, though! We’ll go through a step-by-step process to help you diagnose and resolve this issue, so you can get back to painting your miniatures.
Diagnosing an Airbrush Not Spraying Paint:
Your airbrush may not be spraying paint if:
- The paint flow is weak, inconsistent, or non-existent, even when the paint cup is full.
- The air pressure seems fine, but no paint comes out when you press the trigger.
- The airbrush only sprays air, and the paint remains in the cup.
Common Causes and Fixes for an Airbrush Not Spraying Paint:
- Incorrectly Mixed or Thinned Paint:
- Paint that is too thick may not flow smoothly through the airbrush, while paint that is too thin may not have enough substance to be effectively atomized.
- Ensure your paint is properly mixed and thinned before using it in your airbrush. Aim for a consistency similar to milk, and adjust as needed for different paint types and brands.
- Clogged Nozzle or Needle:
- Paint buildup or dried paint in the nozzle or needle can obstruct the flow of paint, preventing it from being sprayed.
- To resolve this issue, follow the detailed cleaning instructions provided in the expanded “Clogged Nozzle or Needle” section to clear any obstructions in your airbrush’s components.
- Malfunctioning Trigger Mechanism:
- If the trigger mechanism is not functioning correctly, it may not be releasing paint as intended.
- To fix this issue, you’ll need to disassemble, clean, and reassemble the trigger assembly. Follow these steps:
- Turn off and disconnect your airbrush from the air supply.
- Carefully disassemble the trigger assembly by unscrewing the handle and removing the needle, needle chucking nut, and trigger components.
- Inspect the components for damage or wear. If you find any damaged parts, consider replacing them.
- Clean the trigger components using a soft cloth and airbrush cleaner to remove any paint residue or debris.
- Reassemble the trigger assembly, making sure everything is aligned correctly and moving smoothly.
- Reconnect your airbrush to the air supply and test the paint flow on a scrap piece of paper or cardboard.
- Insufficient Air Pressure:
- If your air pressure is too low, the paint may not be properly atomized, resulting in little to no paint being sprayed.
- Check your air compressor’s pressure setting and adjust it as needed. For most miniature painting applications, a pressure between 15 and 30 PSI should work well. However, this may vary depending on the specific paint and airbrush you’re using, so refer to the manufacturer’s recommendations.
By addressing these common causes of an airbrush not spraying paint, you can troubleshoot and resolve the issue to continue painting your miniatures with ease. Remember that patience and practice are key, and don’t hesitate to ask for help or consult the manufacturer if you’re still experiencing problems.
Air Leaks
Air leaks can be a sneaky issue that affects your airbrush’s performance and the quality of your miniature painting. Detecting and fixing air leaks may require some detective work, but with a little persistence, you’ll have your airbrush back in top shape. Let’s dive deeper into diagnosing and fixing air leaks in your airbrush.
Diagnosing Air Leaks:
You might be dealing with an air leak if you experience:
- Inconsistent or fluctuating spray patterns, even when you maintain steady trigger control.
- A hissing or whistling sound coming from your airbrush when it’s connected to the air supply.
- Reduced air pressure, even when your compressor is set to the correct PSI.
Common Causes of Air Leaks and How to Fix Them:
- Loose Connections:
- Loose connections between the airbrush and hose, or between the hose and compressor, can allow air to escape.
- To fix this issue, check all connections and tighten them if necessary. Make sure the hose is properly attached to both the airbrush and the compressor, and that any O-rings or seals are intact and properly seated.
- Damaged or Worn Components:
- Damaged or worn components, such as cracked housings, O-rings, or seals, can cause air leaks.
- Inspect your airbrush and its components for any visible damage or wear. If you find any issues, consider replacing the damaged part. Consult the manufacturer or a professional if you’re unsure about which part to replace or how to do it.
- Improper Assembly:
- If your airbrush has been recently disassembled for cleaning or maintenance, it’s possible that it wasn’t reassembled correctly, causing air to escape.
- To resolve this issue, disassemble and then carefully reassemble your airbrush, making sure all components are aligned and seated correctly. Double-check your airbrush’s user manual or consult the manufacturer for guidance on proper assembly.
- Insufficient Lubrication:
- Lack of proper lubrication can cause some parts of the airbrush to wear out more quickly or not seal correctly, leading to air leaks.
- Apply a few drops of airbrush lubricant to the needle and trigger mechanism to ensure smooth operation and a better seal. Make sure to use a lubricant specifically designed for airbrushes, as other lubricants may not be compatible or could cause damage.
Testing for Air Leaks:
Once you’ve addressed the potential causes of air leaks, it’s important to test your airbrush to ensure the issue has been resolved:
- Reconnect your airbrush to the air supply and turn on the compressor.
- Press the airbrush trigger and listen carefully for any hissing or whistling sounds that might indicate an air leak.
- Test the paint flow on a scrap piece of paper or cardboard, looking for any inconsistencies or fluctuations in the spray pattern.
By identifying and fixing air leaks in your airbrush, you can ensure consistent performance and achieve a higher quality finish on your miniatures. Don’t be discouraged if it takes some trial and error to locate and fix the issue; with time and practice, you’ll become more adept at troubleshooting and maintaining your airbrush.
Airbrush Skipping
Airbrush skipping can be a frustrating issue when you’re trying to achieve a smooth and even finish on your miniatures. Skipping occurs when the airbrush momentarily stops spraying paint, resulting in an irregular pattern. Let’s explore the possible causes of airbrush skipping and how to fix them.
Diagnosing Airbrush Skipping:
You might be dealing with airbrush skipping if:
- The paint flow appears to momentarily stop or stutter while you’re spraying.
- The spray pattern has gaps or uneven sections where paint seems to be missing.
- You experience inconsistent paint coverage, even when maintaining steady trigger control.
Common Causes of Airbrush Skipping and How to Fix Them:
- Improper Trigger Control:
- Inconsistent trigger control can cause airbrush skipping, as releasing and reapplying pressure on the trigger can disrupt the paint flow.
- To fix this issue, practice your trigger control technique. Aim for a smooth, steady motion when depressing and releasing the trigger. Developing better control may take time and practice, but it’s essential for achieving a consistent finish.
- Clogged Nozzle or Needle:
- A partially clogged nozzle or needle can disrupt the paint flow, causing the airbrush to skip.
- To resolve this issue, follow the detailed cleaning instructions provided in the expanded “Clogged Nozzle or Needle” section to clear any obstructions in your airbrush’s components.
- Incorrectly Mixed or Thinned Paint:
- Paint that is too thick or too thin can cause airbrush skipping, as it may not flow consistently through the airbrush.
- Ensure your paint is properly mixed and thinned before using it in your airbrush. Aim for a consistency similar to milk, and adjust as needed for different paint types and brands.
- Insufficient Air Pressure:
- If your air pressure is too low, the paint may not be properly atomized, resulting in skipping.
- Check your air compressor’s pressure setting and adjust it as needed. For most miniature painting applications, a pressure between 15 and 30 PSI should work well. However, this may vary depending on the specific paint and airbrush you’re using, so refer to the manufacturer’s recommendations.
- Inadequate Paint Supply:
- Running low on paint in the airbrush cup can cause skipping, as the airbrush may struggle to draw a consistent supply of paint.
- To fix this issue, make sure your paint cup is adequately filled before starting your painting session. Additionally, monitor the paint level during use and refill as needed to maintain a consistent paint flow.
By addressing these common causes of airbrush skipping, you can achieve a more consistent and even finish on your miniatures. Remember that practice makes perfect, so don’t be discouraged if it takes some time to master the art of airbrushing. Keep experimenting with different techniques and settings to find what works best for you, and you’ll be on your way to creating beautiful, flawless miniatures.
Paint Bubbling in the Paint Cup
Paint bubbling in the paint cup of your airbrush can be both surprising and concerning. This phenomenon occurs when air is pushed back into the paint cup, causing bubbles to form. In this section, we’ll explore the possible causes of paint bubbling in the paint cup and how to prevent or fix it.
Diagnosing Paint Bubbling in the Paint Cup:
You might be dealing with paint bubbling in the paint cup if:
- You see bubbles forming in the paint cup while using the airbrush.
- The paint appears to be mixing or frothing in the cup.
- You experience inconsistent paint flow or spray patterns, possibly due to the bubbles.
Common Causes of Paint Bubbling in the Paint Cup and How to Fix Them:
- Clogged Nozzle or Needle:
- A clogged nozzle or needle can cause backpressure in the airbrush, forcing air back into the paint cup and creating bubbles.
- To resolve this issue, follow the detailed cleaning instructions provided in the expanded “Clogged Nozzle or Needle” section to clear any obstructions in your airbrush’s components.
- Damaged or Worn Nozzle:
- A damaged or worn nozzle may not seal correctly with the needle, allowing air to escape and flow back into the paint cup.
- To fix this issue, inspect your nozzle for any visible damage or wear. If necessary, replace the nozzle with a new one that’s compatible with your airbrush model. Consult the manufacturer or a professional if you’re unsure about which nozzle to use or how to replace it.
- Loose or Improperly Fitted Parts:
- Loose or improperly fitted parts, such as the nozzle, needle, or air cap, can allow air to escape and flow back into the paint cup.
- To resolve this issue, check that all components are correctly seated and tightened. Refer to your airbrush’s user manual or consult the manufacturer for guidance on proper assembly.
- Overfilled Paint Cup:
- An overfilled paint cup can cause paint to be drawn into the air path when you press the trigger, leading to backpressure and bubbling in the cup.
- To fix this issue, avoid overfilling the paint cup. Ensure that the paint level is below the recommended maximum fill line, allowing enough space for air to circulate without causing bubbles.
By addressing these common causes of paint bubbling in the paint cup, you can prevent or resolve the issue and achieve a more consistent and even finish on your miniatures. Remember that proper maintenance and cleaning are crucial for keeping your airbrush in optimal working condition. With regular care and practice, you’ll be well on your way to creating stunning, flawless miniatures.
Airbrush Needles Getting Stuck
A stuck airbrush needle can be a frustrating issue that disrupts your painting session and affects the performance of your airbrush. In this section, we’ll explore the possible causes of a stuck airbrush needle and how to prevent or fix it.
Diagnosing a Stuck Airbrush Needle:
You might be dealing with a stuck airbrush needle if:
- The needle doesn’t move freely when you press or release the trigger.
- You experience inconsistent paint flow or spray patterns due to the needle’s restricted movement.
- The airbrush doesn’t respond as expected to changes in trigger pressure or position.
Common Causes of a Stuck Airbrush Needle and How to Fix Them:
- Dried Paint or Debris:
- Dried paint or debris on the needle or in the airbrush body can cause the needle to become stuck.
- To fix this issue, disassemble your airbrush and clean the needle and other components thoroughly. Follow the detailed cleaning instructions provided in the expanded “Clogged Nozzle or Needle” section to ensure all parts are free from obstructions.
- Bent or Damaged Needle:
- A bent or damaged needle may not move freely within the airbrush, causing it to become stuck.
- To resolve this issue, inspect the needle for any visible damage or bends. If necessary, replace the needle with a new one that’s compatible with your airbrush model. Consult the manufacturer or a professional if you’re unsure about which needle to use or how to replace it.
- Improper Assembly:
- If your airbrush has been recently disassembled for cleaning or maintenance, it’s possible that it wasn’t reassembled correctly, causing the needle to become stuck.
- To fix this issue, disassemble and then carefully reassemble your airbrush, making sure all components are aligned and seated correctly. Double-check your airbrush’s user manual or consult the manufacturer for guidance on proper assembly.
- Insufficient Lubrication:
- Lack of proper lubrication can cause friction between the needle and other components, making it difficult for the needle to move freely.
- To resolve this issue, apply a few drops of airbrush lubricant to the needle and other moving parts to ensure smooth operation. Make sure to use a lubricant specifically designed for airbrushes, as other lubricants may not be compatible or could cause damage.
Preventing a Stuck Airbrush Needle:
To prevent your airbrush needle from getting stuck in the future, consider the following tips:
- Clean your airbrush regularly and thoroughly, especially after using paints that tend to dry quickly or have a high pigment content.
- Be gentle when handling the needle to avoid bending or damaging it. Always store the needle in a protective case when not in use.
- Lubricate the needle and other moving parts regularly to reduce friction and wear.
- Follow the manufacturer’s recommendations for disassembly, assembly, and maintenance to ensure the airbrush is in optimal working condition.
By addressing the common causes of a stuck airbrush needle and following these preventive measures, you can keep your airbrush in top shape and ensure a smooth, consistent painting experience.
Paint Flooding the Surface
Paint flooding the surface of your miniature is a common airbrush issue that can ruin the appearance of your meticulously crafted work. This problem occurs when too much paint is applied to the surface, causing it to pool, run, or obscure fine details. In this section, we’ll explore the possible causes of paint flooding and how to prevent or fix it.
Diagnosing Paint Flooding on the Surface:
You might be dealing with paint flooding on your miniature’s surface if:
- The paint appears to pool, run, or form thick, uneven layers on the surface.
- Fine details on the miniature become obscured or lost due to excessive paint application.
- The finish appears uneven, blotchy, or streaky.
Common Causes of Paint Flooding and How to Fix Them:
- Holding the Airbrush Too Close:
- If you hold the airbrush too close to the miniature, the paint may not have enough space to atomize and disperse, resulting in flooding.
- To fix this issue, adjust the distance between your airbrush and the miniature. A good starting point is to hold the airbrush 4 to 6 inches (10 to 15 cm) away from the surface. Experiment with different distances to find what works best for your specific airbrush and paint.
- Inconsistent Trigger Control:
- If you press the trigger inconsistently or hold it down for too long, it can cause too much paint to be applied to the surface, leading to flooding.
- To resolve this issue, practice your trigger control. Aim for a smooth, steady motion when depressing and releasing the trigger. Developing better control may take time and practice, but it’s essential for achieving a consistent finish.
- Incorrect Air Pressure:
- If your air pressure is too low, the paint may not atomize properly and form larger droplets, leading to flooding.
- To fix this issue, adjust your air compressor’s pressure setting. For most miniature painting applications, a pressure between 15 and 30 PSI should work well. However, this may vary depending on the specific paint and airbrush you’re using, so refer to the manufacturer’s recommendations.
- Improperly Thinned Paint:
- Using paint that’s too thin can cause it to flood the surface, as it may not adhere properly or spread evenly.
- Ensure that your paint is thinned to the right consistency for airbrushing. This may require some trial and error, as different paint brands and colors may have varying requirements. A general guideline is to aim for a consistency similar to milk.
Preventing Paint Flooding on the Surface:
To prevent paint flooding on your miniature’s surface, consider the following tips:
- Develop good trigger control and practice applying thin, even layers of paint.
- Maintain a consistent distance between your airbrush and the miniature to ensure proper atomization and dispersion of paint.
- Test your paint consistency and air pressure settings on a scrap piece of material before applying it to your miniature.
- Be patient and allow each layer of paint to dry before applying additional layers. This will help to prevent paint from pooling or running.
By addressing the common causes of paint flooding and following these preventive measures, you can achieve a smoother, more even finish on your miniatures. Remember that practice makes perfect, so don’t be discouraged if it takes some time to master the art of airbrushing. Keep experimenting with different techniques and settings to find what works best for you, and you’ll be on your way to creating beautiful, flawless miniatures.
These are my recommendations of things that I use all the time when painting miniatures
The Starter Paint Set That I Recommend for small budgets
The Starter Paint Set That I Recommend for large budgets
I like to listen to books on Audible while I paint
Check out these retailers to find hobby products
HOBBY STORES
USA / Canada: Noble Knight Games : eBay (US) :
UK: Element Games : Forbidden Planet
Global: Amazon : Redgrass Games : Warcolours
3D PRINTING
Anycubic : Elegoo : Creality : Sunlu : Flashforge : Matterhackers :

